Update - PC / Mame Fightstick!
20/09/2011
Introduction
On this page you will find tips and some information on the process of building a controller from scratch. It is a collection of discoveries i made while building the controller pictured below and may be useful to you if you are undertaking a similar project.
For some time I had been wanting to make a controller from scratch. I wanted a controller that i could use on my PC for playing roms and other joystick-friendly games. After many hours of googling and trying to find a tutorial or some decent plans to follow, I came across this website
The information presented on the Slagcoin.com website is invaluable. You will find detailed information for every step of the process. Without it, I would not have had the confidence to build one. I followed the 'simple birch' controller plans. However, there were some differences in my method, and I will be going over some of these details in this build report. Here are some photos of the finished controller and 2 youtube videos I have made about the joystick:
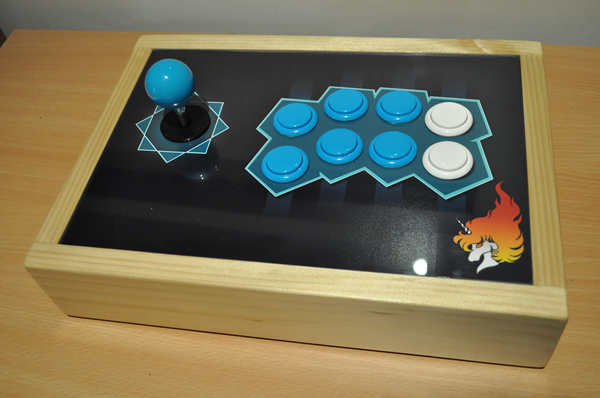
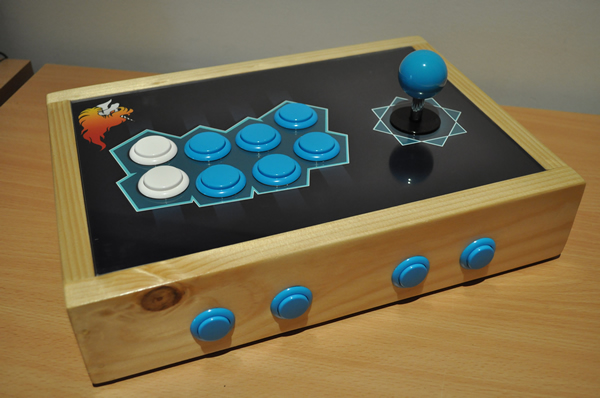

Click photo to enlarge
I have added some notes to the enlarged internal shot
Enclosure Frame
My hardware store didnt have the exact same dimensions of wood as in slagcoins bill of material. The were close from memory, being a centremere out here and there. My controller ended up a centerimetre shorter the the simple birch controller for example (which turned out to be a good thing!). I used a handsaw and sandpaper to cut/shape the four sides and the inner support pieces for the control panel. Getting a frame that was close to square was probably the hardest step of the whole process. A dropsaw would probably have helped make this easier as it would achieve a straighter cut. After I completed this step it occured to me that I could have had my local hardware store cut the wood to size (costs about $1 a cut) and could have been well worth it!
Glue / secure all four sides of the controller at once, and also make sure that the box sits flat, otherwise it will rock while you are using it on a flat surface.
Joystick Type
My controller uses a Sanwa JLF joystick. I immediately noticed a big difference in spring tension between this joystick and my other (colecovision) JLW. The JLF has a much looser / faster action. Although the JLW probably isnt as good a choice for fighting / fast games, it still is the better choice for old school arcade games, especially 4-way games. It has a more effective 4way restrictor plate. For everything else, i use the JLF.
Joystick Mounting
I followed the Slagcoin.com instructions on the simple birch build closely but not exactly. As I did not have a router, I had to rely on my drill press and a number of different drill bits to improvise. I used a forstner bit to drill out the cavarty for the joystick to be mounted underneath the control panel (see internal picture above) leaving about 1cm of wood. This worked well however it does create a messy cavarty. You will probably have to use a drill press if you are boring out the joystick cavarty in this way as the drill press will drill straighter then by hand. Also, set the depth on the drill press, so you dont accidentally drill the whole way through the panel. This will also leave a pretty flat surface to mount your joystick onto.
I used nuts and bolts to secure the joystick to the control panel. In order to keep the tops of the bolts from affecting the flatness of the plexiglass that rests ontop of them, i countersunk the bolt heads into the wood. Most people recommend top mounting joysticks so that you have the full height of the joystick shaft. With only a drill press, this would have been very complicated and may not have worked at all. I ended up with about 20mm of joystick height (measured from the top of the control panel to the bottom of the ball top) as opposed to the recommended 24-26mm top mounted. There is only a small difference, and the joystick is at a comfortable height. The joystick is very securely held in with the nuts and bolts. I would have no hessitation bottom mount a joystick in this fashion again. I would not bottom mount without cutting out the recess though. The height of the joystick With a panel thickness of around 1.5cm's height would be too low. My recess was about half the thickness of the wood deep from memory.
Button Type
I used Sanwa OBSN 8 x 30mm buttons for the top and 4 x 24mm for the back of the controller. These buttons are very touch sensitive and are effortless to use, fast and accurate. Rapid firing with happ style buttons (like on the colecovision controller) in flying shooters like 1942, Raiden, etc, strains my hand after short periods as the require significantly more force to activate. After using the Sanwa OBSN buttons, i would never use the happ style dimple buttons again
Button Holes
As i didnt have a router, i did not recess the 4 utility buttons on the back of the joystick. I was contemplating whether i should do this with spade bits but decided against it as i found the spade bit would cut the recess hole very unevenly. A forstner bit might get around this however. If you are using spade bits (and forstners), make sure you drill out the larger hole (for the nut) first, before you drill out the smaller hole for the button. Remember the center of the spade / forstner bit must pivot on the wood being drilled in order to drill straight.
Plexiglass
I ordered some 3mm plexiglass from ebay, an A3 sheet cost about 15 dollars. One stroke of luck was that my enclousure measured exactly 29.7 across (a4 size). This meant that i just had to make one cut in the plexiglass (an A3 sheet is the size of 2 x A4 sheets). I used a Stanley Knife (exacto-knife) and made repeated cuts on the plexiglass until i could snap it without too much force. I used the edge of a table to support the plexiglass when i snapped it. Then i sanded the edge so that it would fit the enclosure (it was a few millimetres too big on most sides).
Once the plexiglass fit the frame properly, I secured the control panel with the screws / brackets, and taped down the plexiglass ontop of it. I drilled the plexiglass AND the controller panel together, while they were securely held inside the enclosure. I drilled 2mm pilot holes, then drilled through both again with a spade bit. As the control panel was screwed into the enclosure and the plexiglass was taped to the enclosure, neither panel moved and this step turned out to be quite easy. Also remember, you must drill the button nut holes out on the underside of the control panel before doing this step (drill with the larger spade / forstner bit first). I used a 38mm spade bit for the nut holes which was a good size. I was worried about shattering / poorly cut holes in the plexiglass as I had read plexiglass was a pain to work with. With a spade bit and the drill press, i had no problems at all. The holes were cut cleanly and accurately. I also set my drill press onto its lowest speed as i read this would help keep the drill bit cool while drilling.
Keyboard Encoder
I used an old microsoft wireless keyboard for my fightsticks interface. A problem i encountered is "keyboard blocking" and i will explain a little bit about it and how I got around the problem.
Keyboard Blocking Work Around
The Short Explanation
Dont use the same track on the keyboard encoder more then twice when wiring up your joysticks / buttons and you should be fine!
The Long Explanation
Blocking is a mechanism built into modern keyboard encoders (as of mid 90's I believe) that automatically stops a combination of buttons being pressed simulataneously. This can sometimes result in the encorder sending a "phantom" character to the computer; a character that the user did not press. This is good for typing, but is no good for arcade controllers. For example, lets say you wire up left and down on the joystick and button 1 and they all use the same track, lets say, track number 3. In a game you move your character diagonally left and down, and try to fire as well, you might find the the fire button does not work (is being blocked). It will work when press seperately, but it will not work when press in combination with the down and left buttons. I had this exact problem. In testing the controller in UN squadron, i found i could not move diagionally left and down and fire at the same time. All buttons worked seperately, but not together. I found all 3 of these buttons were connected to the same track resulting in the fire button being blocked by the encoder. The simple solution for me was to avoid using the same track more then twice.
Running Low On Encoder Tracks?
There are about 26 tracks on most modern keyboard encoders. When wiring up your controller you may notice that there are 8 of the 26 tracks that are used regularly (i will call these "common tracks"). Every button on the keyboard connects once to these 8 tracks and once to the remaining 18 tracks to create a loop to the encorder and produce a character. 8 tracks can be used up quickly (8 tracks, used twice = 16 buttons) particularly if you are wiring up a 2 player controller. It's a good idea to assign up and down on the joystick/s with the same common track, as it is phyiscally impossible to press up and down on the joystick at the same time. This would only count as using that track once, you can't activate them both at the same time. This obviously can also be used for left and right as well.
Indepth Look at a Keyboard Hack
I found this excellent youtube instructional video on mame keyboard hacking detailing the process in almost exactly the same way as I went about it.
Connectors and Crimping
For the joystick microswitch terminals I used futurlec.com 6.4mm spade connectors which fit snugly.
The Sanwa OBSN's use a smaller spade connector. I found some "phone type 3.2mm" spade connectors at my local electronics shop (jaycar) that I found to fit perfectly.
I used rows of header strip to tap into the keyboard encoder. To connect to these, i used shrink wrapped header pins on the end of the wires. I shrink wrapped the header pins because the headerstrips get a bit tight and I did not want them shorting out on each other.
I bought the HT-202A crimper from futurlec.com. This came in handy for crimping all of the above connectors (spade 6.4mm and 3.2mm and header pins.). I also used the ribbon cable on Futurlec.com, seperating the individual wires. This worked reasonably well. The diameter of the wire could have been a touch wider though.
Control Panel Overlay
I tried printing off my design with an injet on glossy photo paper. This did not work very well as the glossy surface of the photo paper stuck to the plexiglass under pressure and i also found the ink was coming off and sticking to the plexiglass. I then tried high resolution cardstock. Although this solved the problem of the print sticking to the plexiglass, the actual print on the paper looked very washed out (black looked grey for example). I took my design to a local photo lab (Big W) and printed off the design as a photo in size 8" x 12" on matte finish. This worked, the printed matte page did not stick to the plexiglass and the colors were deep and bright. And it only cost $3.50 :)
I had to print off many test templates on my home printer to get the graphics in the right spot on the control panel. Its for this reason that I would encourage you to do the artwork absolutely last.
I have provided my original artwork in PNG format below (coming soon) for you to change and edit to your own liking. An acknowledgement to this website would be appreciated if you use these graphics, but is not required.
Conclusion
As sad as it is to admit, my new fightstick kicks the pants off my old colecovision controller. This is mainly due to the smaller size of the controller and the new controller is also more comfortable to handle. Also the sanwa buttons are so much easier to press, and the joystick is much faster. I found my old Sanwa JLW difficult to use in fighters as the diagonals are hard to hit and the spring tension is too tight. However, the JLW is still a better choice for old 4way games though in my opinion, and i still use it for this purpose and as a secondary controller for a 2nd played. It took time and planning, but it was definitely worth it! I strongly recommend doing some research on the Slagcoin.com site before you start.
Good luck and thanks for reading!