The Replicate Tool
Program: Vue 6
Printer Friendly Versions - html format
Introduction
In this tutorial we will be looking at vue 6's replicate tool and how it works. I will be giving an overview of the tool and then creating a simple staircase followed by a spiral staircase to demonstrate how you can use the replicate tool, to create structured object groups.
![]() See my scatter tutorial to learn more about the vue replicate / scatter tool.
See my scatter tutorial to learn more about the vue replicate / scatter tool.
Using the replicate objects page
Using the replicate objects tab you can create more structured / uniform object groups. Examples of this might include fencing panels or a row of dominos. The object values are applied each time an instance of the orginal object is created, in a sequential manner.
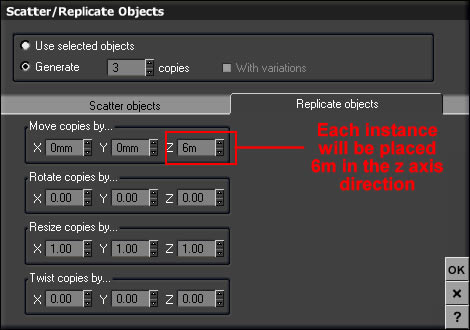
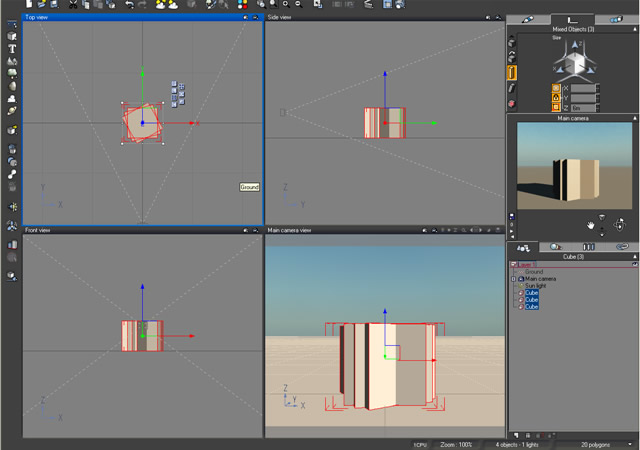
In this example I will be using the same scene set up as the scatter tool tutorial: I have created a default scene with a 6m x 6m x 6m cube. I will be using this scene to demostrate the effect of using the replicate - move field. In this example I have entered a value of 6 in the z axis. I have entered the value of 6 because my cube is exactly 6x6x6 in size. This means that each time a cube is replicated, it moves 6m in the z axis direction. This creates a perfect stack of cubes:
Replicater: Move Example (6m Z Axis)
Click to Enlarge
Click to Enlarge
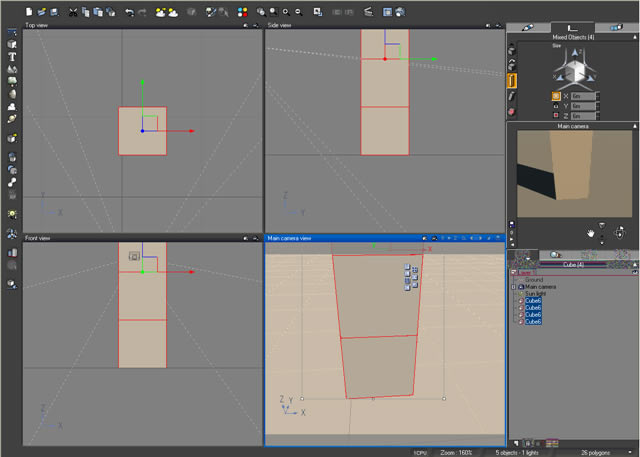
The replicate tool is relatively self-explanatory. If you do not want to apply a particular modifier, enter values of zero so they have no effect (except for the resize modifer which you enter 1 for each axis). You can set values for all of these sections if you require them all. Every active modifier will be applied once for every duplication. So for instance, if you set 2 copies to be created, and specify a rotate modifier of 15 degrees on the Z axies, the result will look like this:
Click to Enlarge
A cube is created rotated at 15 degrees on the z axis followed by another cube. The behaviour of the replication tab is logical. Instead of going through each field, i will be demostrating to you a practical example of how you can use the replicate tool to create 2 object groups: a simple flat staircase and a spiral staircase.
Replicate - Simple Flat Staircase Tutorial
When designing an object array using the replicate tool often calculations and some trial and error are used. In this example we will be creating a simple flat staircase followed by a floating spiral staircase.
Flat staircase: This example is very simple, but it will give you some idea of how you can use this tool to make objects in your scenes, and is a great starting point for beginners..
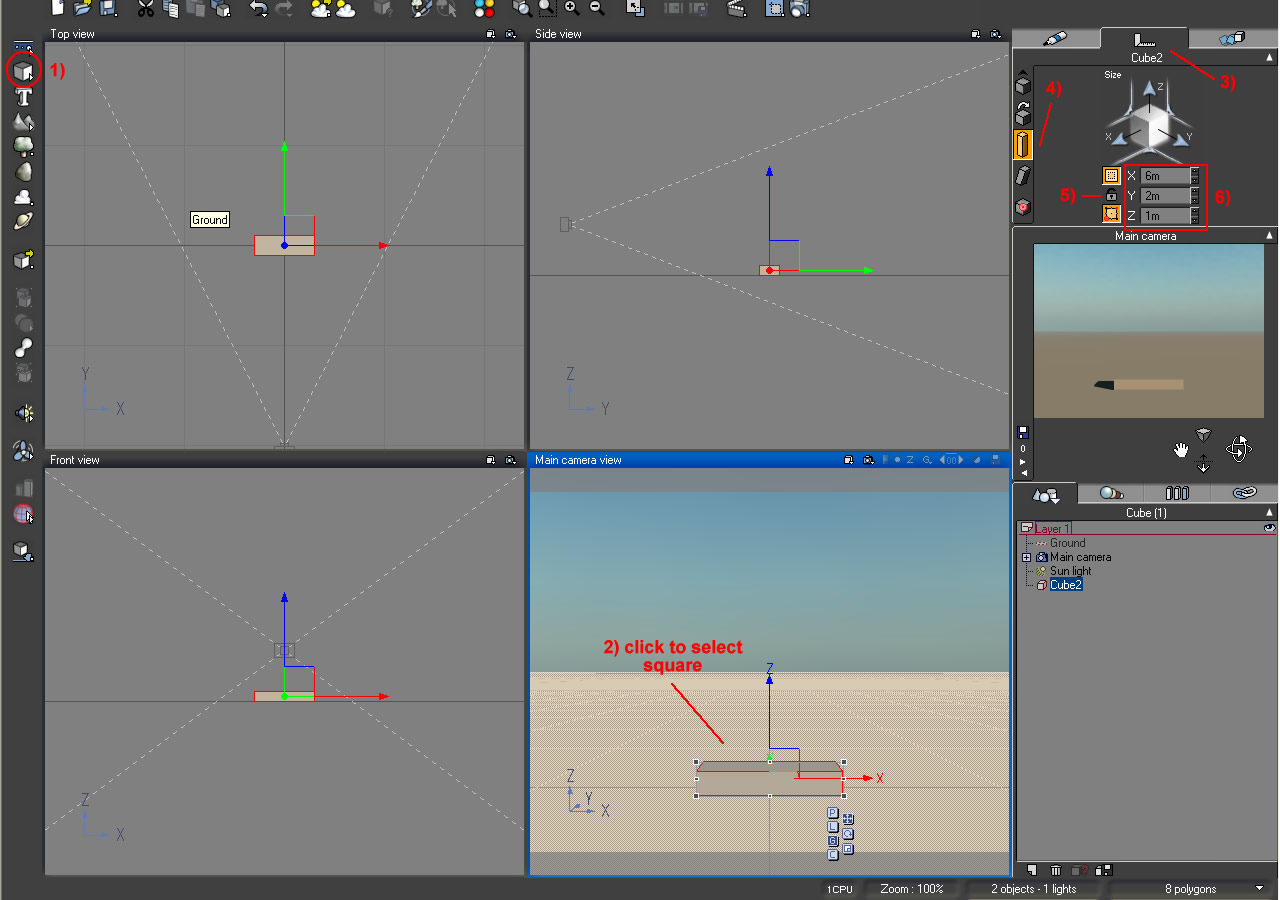
Create the step object: First we need to start with a flat rectangle which will represent one of the many steps in the staircase.
1)
Create a square from the left hand side tool bar.
2)
Click on the square in one of the 4 viewports to select it.
3)
At the top right corner of the screen, click on the picture of the ruler: numerics. This is where we can manipulate our objects using numerical values.
4)
Click on the size tab inside the numeric screen
5) Click on the picture of the padlock, this will disable the 'Constrain Proportions'
lock
6)
Enter the following values for X Y and Z size values: X: 6m Y:2m and Z:1m. This screenshot highlights all of the above instructions and shows the resulting object:
7) open the scatter / replicate tool: Click on edit in the file menu then select scatter / replicate from the drop down menu.
8) Enter the number of objects (steps) that you want to create in the generate ( ) copies field.
9) Click on the Replicate tab
10) In the move field of the replicate tab enter 2m for the Y axies and 1m for the Z axies.
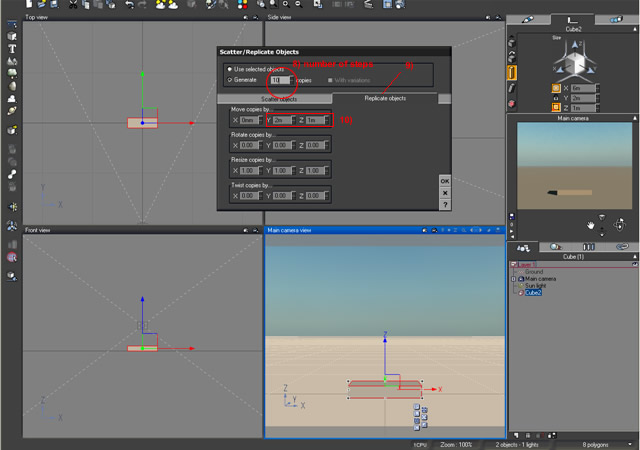
The end result should look something similar like this:
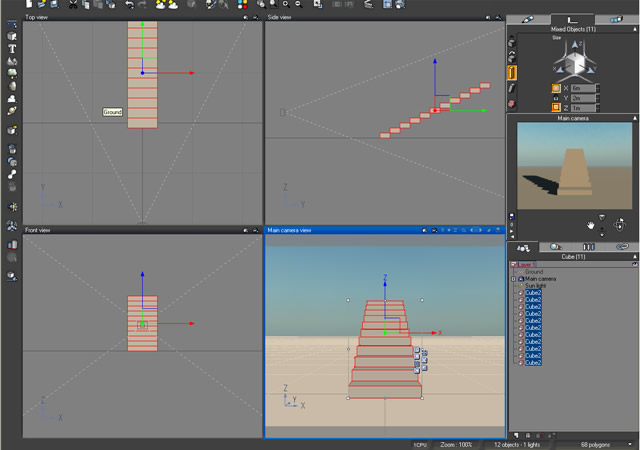
This is a simple example of how you can use the replicate tool to create object arrays. Now we will create another staircase, except it will be a spiral floating staircase.
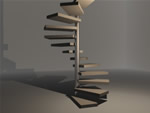
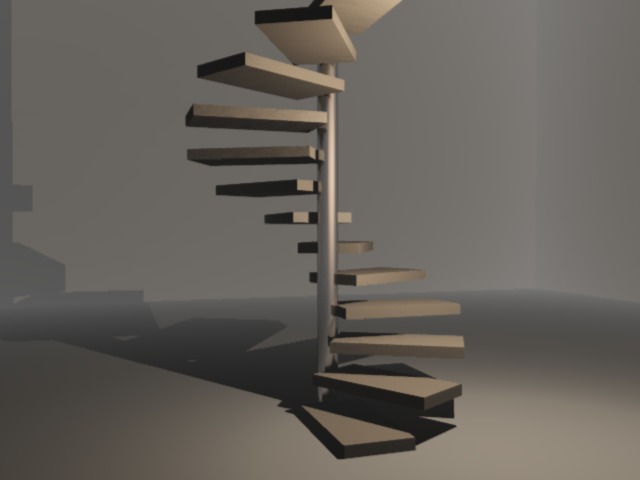
Replicate - Spiral Floating Staircase
This staircase will incorporate both the move field and the rotate field to create a spiral of wooden planks, that will represent our floating staircase. We will also be defining a pivot point for our step object.
1) Create a square and change its size attributes to the following: X: 6m Y: 3m Z: 0.5m. This will create a flat rectangle "wooden plank".
2) Click on your plank object in one of the 4 viewports to select it.
3) We need to tell the object at what position we want it to rotate around. If we do not specify this the planks will rotate around the default pivot point position: the center of itself, which is not the behaviour we are after in this case.. Click on the numerics tab and from the right left hand options select "pivot positiont".
4) In the pivot position screen select the "show pivot on/off" to enable it. You will notice that when you press this button a small, and rather hard to see, dot will appear in the center of your object. if you have trouble seeing this dot, you can continuely press the show pivot button, on and off, so you can see it appearing / disappearing. This is the objects pivot point: The point which our object rotates around.
5) Select the pivot point in the top view and move it to just over the left hand edge of the rectangle. (see below screenshot).

6) Now that we have defined a pivot point we can replicate our wooden plank object. Go to the replicate / scatter tool dialogue box: Edit menu then select scatter / replicate objects.
7) Inside the scatter / replicate tool dialogue box enter how many iterations or "wooden planks" you want to have in your scene (12 steps = 1 x 360 degree revolution - more on that in just a moment)
8) Click on the replicate tab.
9) in the move field enter a value of 1.5m for the z axies. This will lift each step 1.5m above the last ie the smaller the number you enter for this field, the smaller the gap between each step.
10) In the rotate field, enter a value of 30 (degrees) for the Z axies. This will create 12 steps per 360 degrees: 12 x 30 = 360.
11) Click ok when done, and you will have a trail of planks spiralling upword.
12) To finish off the staircase position a clinder in the center of the staircase and enter these size values in the numerics tab: X:1m Y:1m Z:20-40m.
Your end result should look something like this:

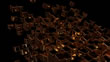
This is a quick render of the above replication array in a radiosity scene using a simple beechwood material from the 3D models section of this site.
This concludes the replicate tool tutorial
Chromesphere