Cutting out a Letter from an object and adding light
Printer Friendly Versions - html or pdf format.
In this tutorial i will be explaining how to cut out a letter from another object and then creating a light inside the cut out area. I will be using the letter C and a sphere in this tutorial however you can use this process with whatever other combination you like.
Create the objects
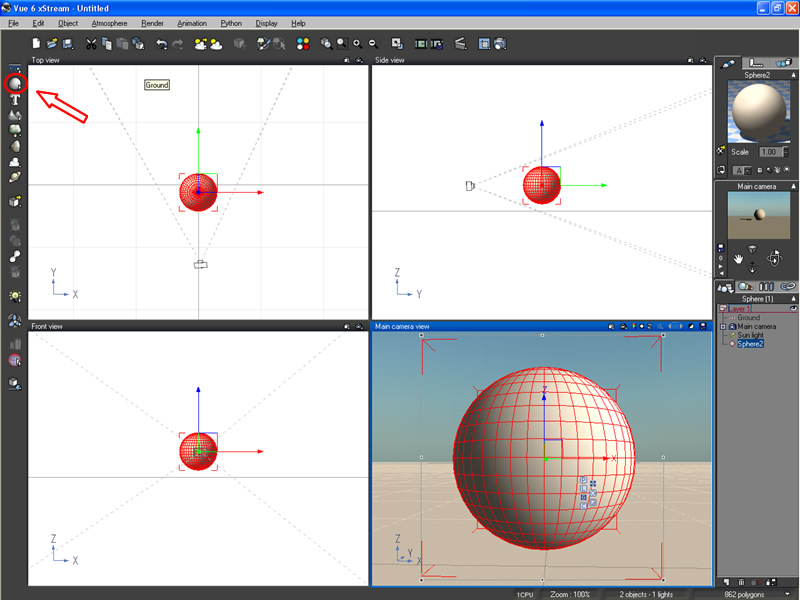
To begin, create a sphere. Position the camera so that you can see the sphere well.
Click to enlarge
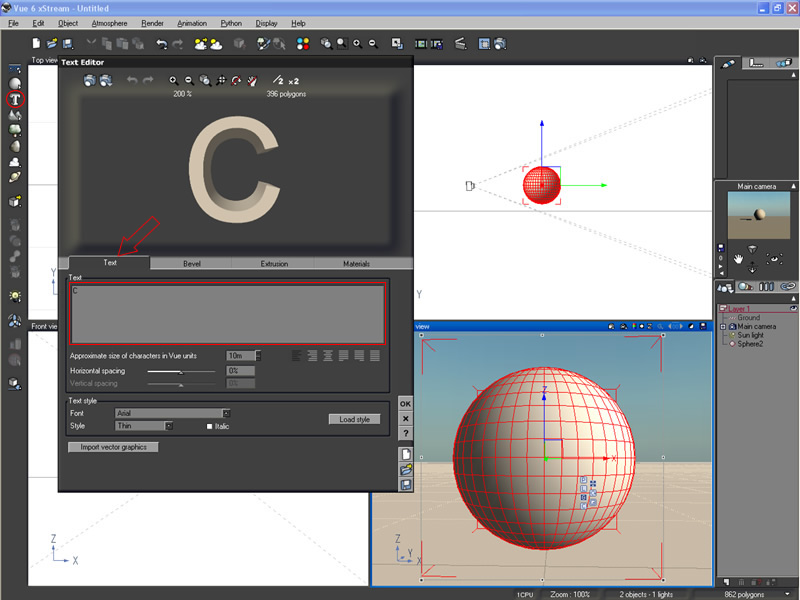
Create a letter. To do this, click on the text editor button on the left hand side of the screen. Click on the "text" tab and then enter the text you want to cut out from you object in the "text" field. In this example i have enter the letter "C". You can change any of the other parameters on this screen if you would like to customize your letter differently.
Click to enlarge
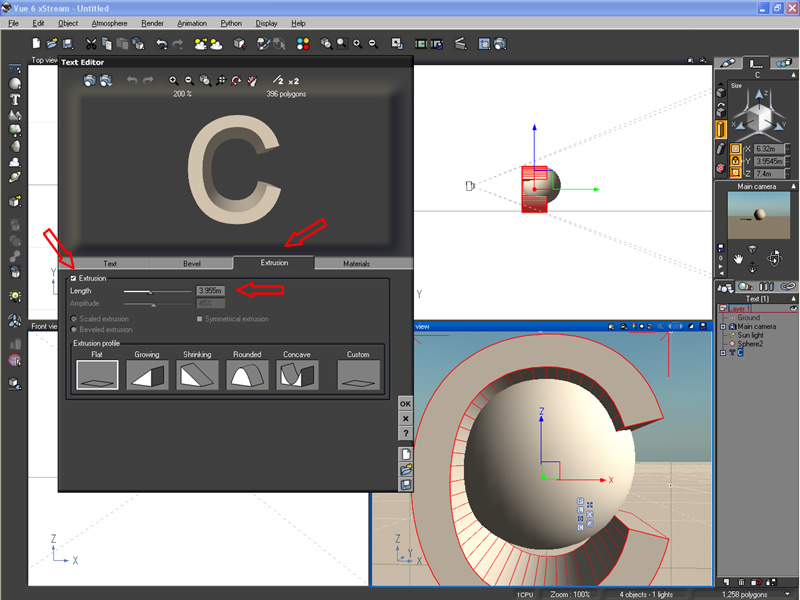
Click on the "Extrusion" button in the text editor. Make sure the extrusion check box is checked. Move the Extrusion slider to about a third of the way along. Click ok to exit the text editor.
![]() Note: You can return to this screen whenever you like by double-clicking your text object in the any of the preview windows.
Note: You can return to this screen whenever you like by double-clicking your text object in the any of the preview windows.
Click to enlarge
Modify the objects
There's a good chance your letter will not be in the right proportions to your sphere, so you will need to edit the letters object properties.
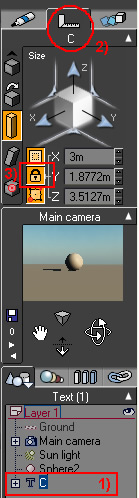
1) Select your letter C object.
2)
Click on the numerics tab in the object properties box at the top right corner of the screen. Also make sure that the "size" icon on the left hand side of this tab is selected.
3)
Make sure that the "Constrain Proportions" icon (the small padlock icon) is on.
Click to enlarge
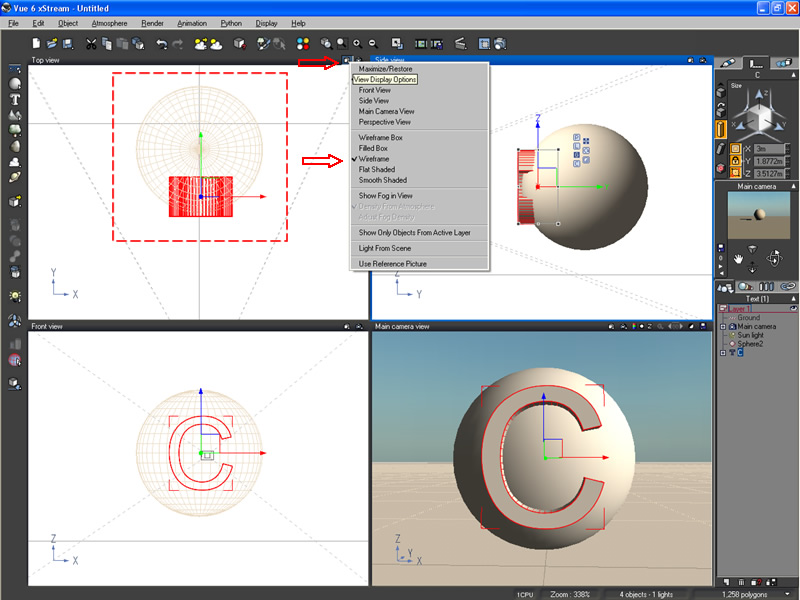
Still inside this dialogue box, adjust the "X" axis until your C object will fit comfortably inside your sphere. Try entering different values and watch the preview screens to find the right value. Position the letter half-way into the spheres center. Note: This will be easier to do by changing the preview option for your "Top View" preview window to the "wireframe" type.
The dotted line box in the picture below shows the result we are trying to achieve.
Click to enlarge
With only the Letter C selected, press shift-D to Duplicate this object. You can move this new object out of the way if you like, but please note that you will need to position it back exactly to where it was after the following step..
Cut out the letter and position objects
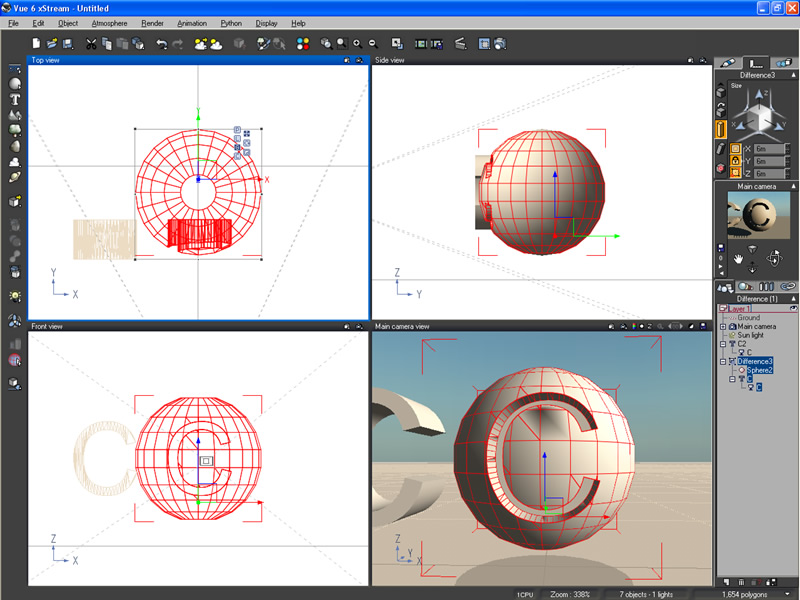
In the layers window (bottom right-hand side of the screen), hold down shift and click on the sphere object followed by the Letter C Object, in this order. On the left hand side of the screen right click on the boolean operations button and select the "difference" operation. The result is shown here with the duplicate C letter pushed to the left hand side.
Click to enlarge
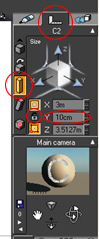
If you have moved the duplicate C letter aside move it back to its original position, ie, inside the C cutout. With the duplicate C letter selected and in the object properties "Numerics" tab, uncheck (turn off) the padlock "constrain proportions" and enter .1 (point 1) for the Y axis under "size". This will make the duplicate C very thin.
With the duplicate C object still selected and in the top view preview window, grab the duplicate C letter on the Y axis and move the object to the back of the cutout we made before.
Apply Materials and LIght
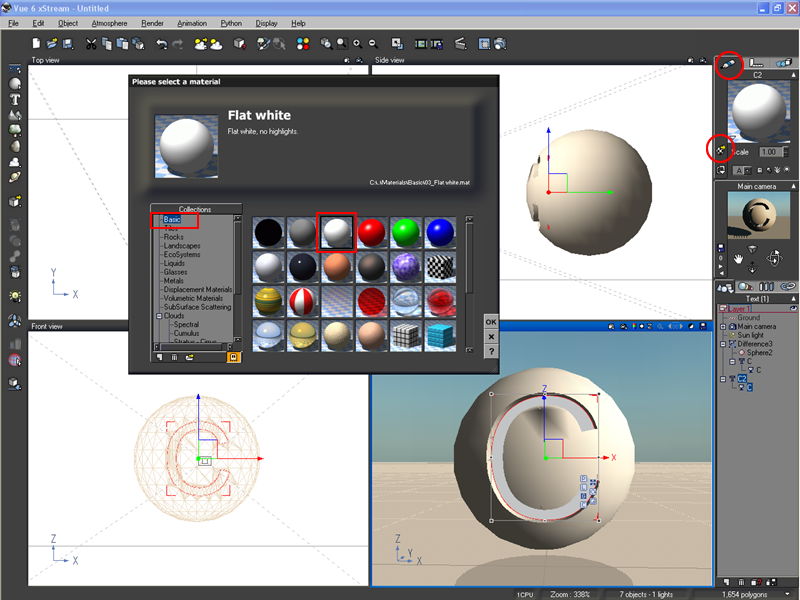
Click the aspect tab in the object properties dialogue box and select "load a material" and select "flat white" from the "basic" collection. Click ok to close the material library window.
click to enlarge
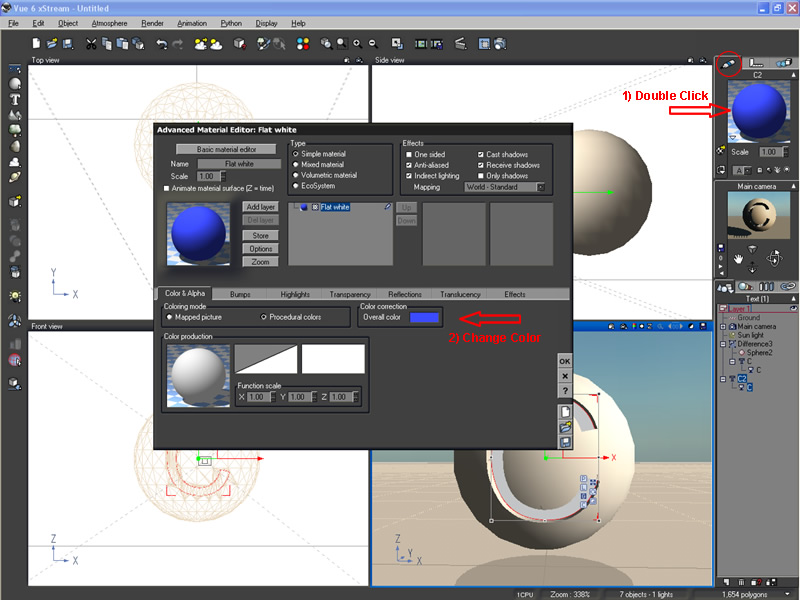
!) In the "aspect" tab of object properties, double click the object preview (ie: the white sphere), to bring up the material editor.
2) Inside the material editor, change the "overall color" to the color of the light you want. In this screenshot i have selected a neon blue color.
Click to enlarge
Still inside the material editor click on the "effects" tab. Check the "Glowing Material" setting and adjust the "intensity" and "radius" until you have the desired effect.
![]() Note: If even at 100% the glow effect is hard to see try moving the duplicate C letter object forward inside the cut out so that it is more visible. Your atmosphere can also affect the amount of glow the effect produces.
Note: If even at 100% the glow effect is hard to see try moving the duplicate C letter object forward inside the cut out so that it is more visible. Your atmosphere can also affect the amount of glow the effect produces.
Finish
You can apply a texture to the sphere too. In this final render, i applied the Vue 6 library material "Chrome" to keep with the theme of this websites name. I also added a soft spotlight to the face of the sphere as the atmosphere i was using was too dark to see the features.

800x600 | 1024x768 | 1280x960 | 1600x1200
This concludes this tutorial.
Chromesphere.