Creating Area Lights
Program: Vue
Printer Friendly Versions - html or pdf format.
In this tutorial we will be creating a basic scene with radiosity and converting text to an area light.
To begin, open a new scene and select a sunset. Different Atmosphere settings can have different effects on the final output. Dark atmosphere's will work better for this tutorial, so for this example I have used a Sunset atmosphere. Sunset --> Spectral Sunset, "Good Night".
Create some text
To do this, click on the text editor button on the left hand side of the screen. Click on the "text" tab and then enter the text you want in the "text" field. In this example i have enter the word "Welcome!". You can change any of the other parameters on this screen if you would like to customize your font style in a different way. Exit the text editor when done.
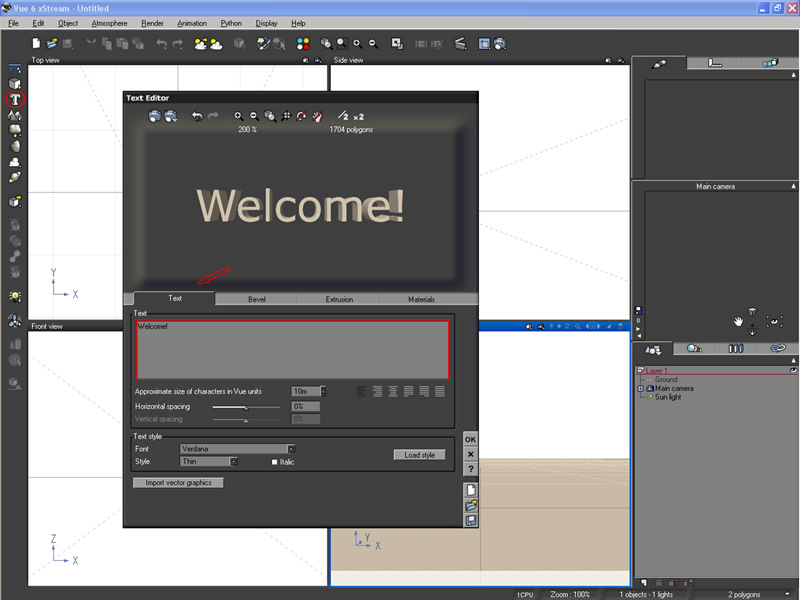
Click to enlarge
Resize this text
Select your newly created text and in the upper right corner click on the "numerics" tab. On the left hand side of this box, click on the "size" button. Turn on "Lock sizing proportions" (a small padlock icon) first and resize your text to a medium-small size (like the one pictured below). Turn off "Lock sizing proportions" and change the size of the Y axis to a low number eg .1 (point 1) to make the text very thin.
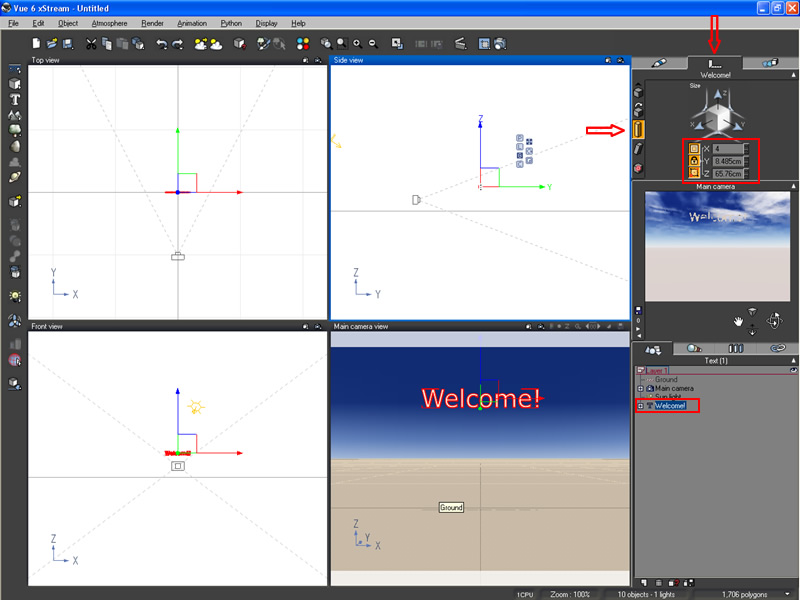
Click to enlarge
Create a wall
On the left hand-side of the screen right-click on the create primitives button and select a cube. Select the cube and adjust its size properties. Enlarge it to create a wall that fills the screen. Using the top-down view move the cube back so that the camera is the required distance from the cube. Move the welcome sign so that it is positioned in front of the wall with a small amount of space between the 2 objects. Your scene objects should be positioned similar to this picture.
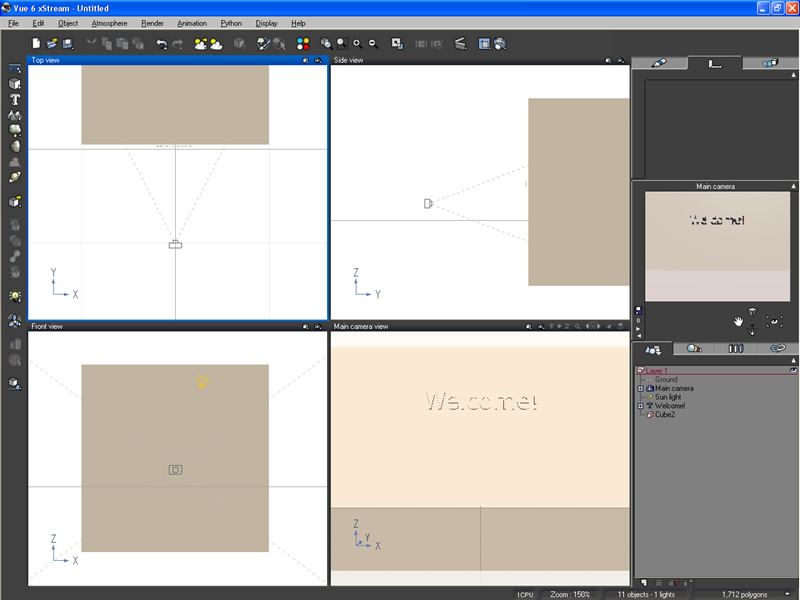
click to enlarge
Transform text to area light
Select your text and click Object --> Convert to Area Light at the top of the screen in the Vue menu bar. With the newly created area light selected, click on the "Aspect" tab at the top of the screen. Change the "power" of the object's light to 60. Above this setting there is a "color" setting. If you wish to use a different colored light, change this setting to the desired color. Right click on the Volumetric Light setting on the left hand side of the "Aspect" tab and turn on Volumetric Light. Enter a value of "1" (or less) for the volumetric intensity setting inside the light editor.
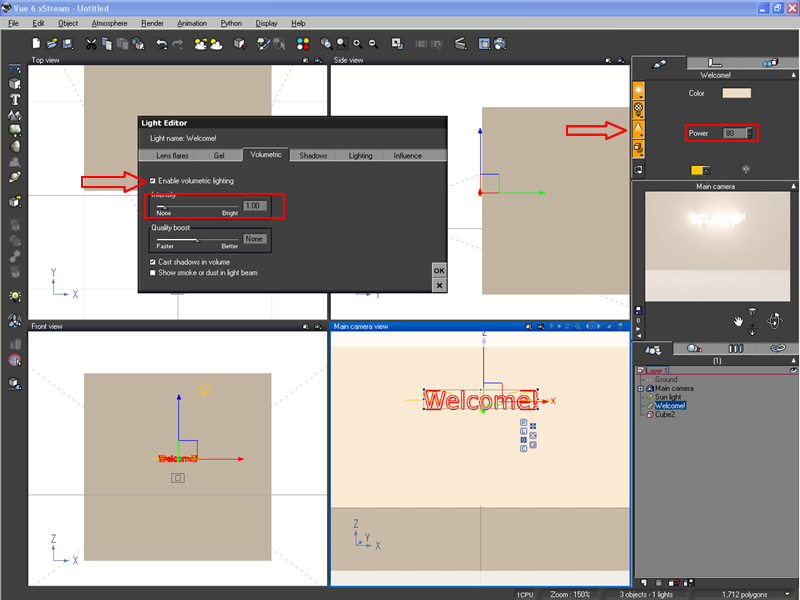
click to enlarge
In the Menu bar, click on "Atmosphere" then select "Atmosphere Editor". Click on the "Light" tab. Under "lighting model" select "Global Radiosity". Exit the atmosphere editor. In the layers list on the right-hand side of the screen, select "sun" and hit delete to remove it from the scene.
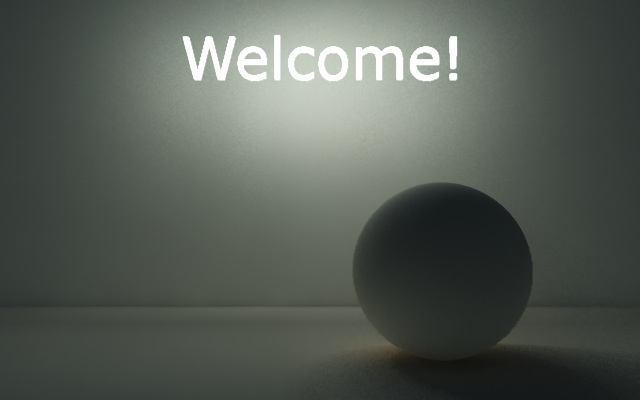
Here is a final view of this scene with a sphere in the foreground.
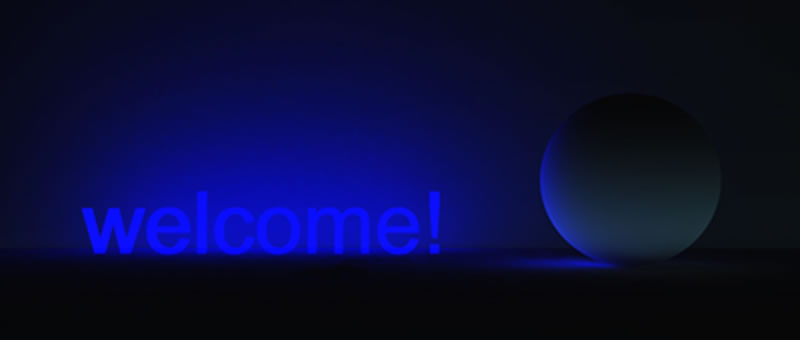
Here is different scene i created using the above process, except with blue used for the light color to create a neon effect..
Try adding textures to the wall and floor or add some objects to the scene to add more subject matter.
This concludes the area-light tutorial. Thanks for reading!
Chromesphere
Tips for improving quality in area light scenes:
- Try adding a small amount of volumetric light (below 1).
- If you are receiving grainy shadows or lighting increasing your shadow softness quality inside the light editor, on the shadows tab can help smooth out rough shadows.
- Make sure your light source is not too close to the wall. In some cases this can have undesirable effects.
- In your atmosphere editor under the "light" tab, try shifting the "light balance" slider up 100% and enter a value of "1" for gain next to radiosity. This will remove a lot of external light from your scene.
- Experiment with the atmosphere editor and light editor to create different effects.