
www.chromesphere.net
Working with the Render Preview Window
Tips for using the preview window
In this tutorial i will be showing you a few tricks to help you use the preview window more effectively.
The render preview window does just what the name suggests. It shows us a snapshot of what our scene would look like if we were to render it. It is located in the camera control panel.
Parts of the scene information bar
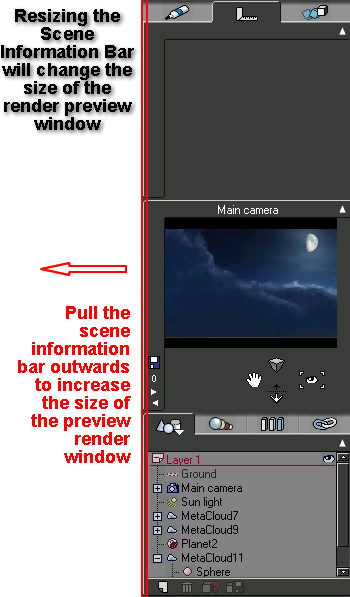
Varying the preview windows size
You can adjust the Preview Render windows size by resizing the scene information bar. To do this hover your mouse over the left hand side of the scene information bar. When your mouse turns into a double arrow icon, click and drag to the left or right. The preview window will change its size accordingly.
You will also notice that if you make the scene information bar too big, the preview panel will reposition itself to the top of the screen, along side the properties panel and expanding the world browser upwards. If you are not after this type of layout, Try to stop enlarging the scene information bar before this happens.
Modifying the preview window options
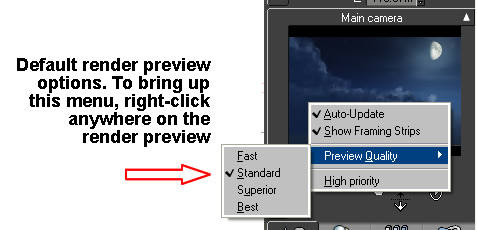
To change the preview windows quality settings, right click on the preview window, then select "Preview Quality" from the list that appears, and choose one of the available preset render qualities. The default is standard. When working with complicated scenes you may find that the preview window is taking a long time to render. You may want to try changing your preview render quality to "Fast". There maybe other situations when you need a higher quality render to see more detail in your scene. For this you would select either "Superior" or "Best".
Another option we have from the above mentioned right-click menu, is the "High Priority" setting. By default Vue will render this preview screen whilst performing other tasks, slowing down the preview render. If "High Priority" is enabled, the preview render window will receive priority over all other background tasks, decreasing render time.
Left clicking the preview window.
You can also update the render preview window at any time by left clicking on the preview screen. This technique is extremely useful, particularly when inside another dialogue box. For instance, if you are trying to decide the overall color of a material, you can select the color and while still inside the material editor, click on the preview window, for a preview of the new material color. If the dialogue box is overlapping the render preview window, grab the dialogue box's title bar and move it to one side.
Note: There are a few settings that won't update when clicked on inside a dialogue box. In this situation you will have to apply the changes (closing the dialogue box) and then update the preview window.
This concludes the render preview window tutorial. Thanks for reading!
Chromesphere.